
fibre-glassing tips
The staff at Fibreglass Developments have many years of experience working with composites. We have put together a few guidelines and tips for your convenience, but feel free to Contact Us if you need more comprehensive advice for your project.
Basic Design Tips
The list of articles that you can make using composites is almost endless, but to name a few - boats, canoes, chess sets, showers, industrial piping, underground petrol tanks, vehicle repairs, garden ponds, replica armor. You name it, fibreglass can often do it. With a few simple tools quite large projects can be tackled
The only restriction is your vision!
There are a multitude of fibreglass/composite products on the market, made from a variety of methods. Invariably they are made in a mould, so it seems obvious that the number one consideration is that your final product must be removable from your mould.
The only restriction is your vision!
There are a multitude of fibreglass/composite products on the market, made from a variety of methods. Invariably they are made in a mould, so it seems obvious that the number one consideration is that your final product must be removable from your mould.
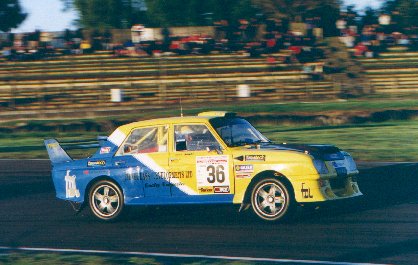
Many may get a shock at the cost estimate to make (for example) a light weight front end for their favorite chariot,
but the steps are as follows:
1. Make a Plug - the exact replica of the article you want, made from custom wood, ply, bog, high density foams, or whatever may be cost effective for your particular project. The plug must be finished to the quality you want your finished product to emerge from the mould as. Everything on the plug is reproduced exactly, apart from sanding out blemishes and defects either on the plug or mould, these will appear on the article.
2. Make a Mould - the mirror image of the plug, taken off the plug. The plug must be prepared with release agent to prevent sticking of the fibreglass laminate laid over it. The construction of the mould will vary according to the number of units expected from it. One-offs can be very light. High production moulds will obviously be very solid and well supported, possibly by timber or steel frames.
3. Make the Article - your final product constructed according to final use and the quality dependent on the effort gone into the previous two steps. It costs no more to make a product with a first class finish, than one with a terrible finish. The extra costs are in the previous two steps.
As an indication, plug and mould costs are multiples of the final article cost. For a moderately complex article requiring a one piece mould, and approximately 50 units required these could be as follows:
Mould: 2-4 times the article cost
Plug: 2-4 times the mould cost
Some points to consider to make sure you get what you want at a cost effective price:
Properties
It is not cost effective to use composites in conventional applications against conventional materials, unless you are exploiting its advantages. If you are going to use it, get the most out of it!
Basic composite laminates, while strong, are not stiff. Do not confuse these two properties. For example a 4mm thick strip of fibreglass may bend twice as much as a strip of 4mm ply for the same load, but it may take 4 times the load before it breaks! (These are indicative figures only)
Corners
Need to be radius, the more the better - a minimum of 6mm would be acceptable in most cases. 4mm and less is possible, but as you decrease the chances of chipping on either the mould or article increases dramatically.
Shape
|
The virtually limitless advantage of using composites! Anything is possible if you follow these points:
While a complex shape can have the mould made to remove it, consider also there has to be some room to apply the laminate to the inside of the mould. |
|
Flat areas
Should be avoided and slight curves (bellies) put in such areas. This is because of low stiffness as mentioned above, and shrinkage which pulls all corners internally, regardless of whether it was internally or externally moulded. Stiffness can be improved by increasing thickness with cores such as ply, (see Plyglas®), balsa, pvc foams, hi-density polyurethane foams etc. Top hats, ribs, etc may also be added as required.
Thickness variation
Unless moulded using RTM, there will be some. You will have one moulded surface which will be smooth if the mould is, and one textured surface which may vary in thickness by 0.5-1mm depending on the laminator and the process. The thicker the laminate, the greater the likely variation. Cores of known thickness reduce this to the variation in the fibreglass skins only. Tolerances are required in the design to allow for this.
Thermal expansion
Fibreglass has very low thermal conductivity, but it does expand and contract significantly - 2.5 times that of mild steel, 2 times that of alloy. Fixtures for large or long structures should allow for this.
Surface finish
Again almost unlimited possibilities. For large flat areas, a textured or semi-gloss is recommended to conceal possible imperfections that can show with aging. Shrinkage can cause print through of fibres. If a textured finish is chosen, this can have a significant influence on de-moulding and draw must consider this.
Colour
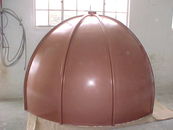
Most colours are available, even metallic and copper (see Fielding Clock Tower). Dark colours will age faster if outside and will absorb heat affecting the expansion of the product. Metallic are possible but are difficult to apply on complex moulds without a 'shadowing' effect. Metallic paints are also extremely difficult to touch-up.
The above tips are only a guideline, and cannot make up for the years of experience FDL has in this industry. When you have a project to make in fibreglass, feel free to CONTACT US for the best possible advice in product and laminate design.
The above tips are only a guideline, and cannot make up for the years of experience FDL has in this industry. When you have a project to make in fibreglass, feel free to CONTACT US for the best possible advice in product and laminate design.