
fibreglass repairs
PREPARATION
Fibreglass repairs are usually done on the back of the laminate. This is to reinforce the laminate prior to finishing the outer surface.
The surface to be repaired must be free from oil, grease, paint or any other contaminant to ensure maximum adhesion. If solvents are used, dry surface before rough sanding a minimum of 75mm around area to be repaired.
APPLICATION
500mm by 500mm fibreglass mat - use 500ml resin and 10ml catalyst (MEKP)
1metre by 1metre fibreglass mat - use 1 litre resin and 20ml catalyst (MEKP)
For a gelcoat finish, apply gelcoat to slightly overfill the repaired area and allow to cure. When cured sand smooth with wet & dry sand paper, finishing with a very fine grit paper, and polishing.
- Preparation completed, tape over any holes on the outer surface.
- Cut or rip the glass to the size of the sanded area. Several layers will be necessary to build laminate to the required thickness for strength. If the area to be repaired is larger than 200 square mm, rip glass to manageable sizes for ease of wetting out.
- Use table to calculate the amount of resin needed for the job.
500mm by 500mm fibreglass mat - use 500ml resin and 10ml catalyst (MEKP)
1metre by 1metre fibreglass mat - use 1 litre resin and 20ml catalyst (MEKP)
- Wear safety gear as recommended. Have a piece of cardboard, plastic etc. on which to wet out fibreglass.
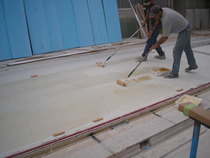
- Thoroughly mix the resin and catalyst (MEKP). Working time is around 15 minutes in warm conditions. Lay glass patch on cardboard and thoroughly wet out with resin - use a clean paintbrush for application. Coat the sanded area with resin and lay on the wetted out fibreglass patch. Work area with paintbrush to remove any air bubbles or wrinkles. Build up 3 - 4 layers and allow to cure (about 1 hour in warm conditions). Sand area and apply extra layers as required.
- Remove tape from outer surface before curing is completed. It may be necessary to fill any deep cavities in this area, but leave surface slightly under filled.
- Sand under filled area to provide a good adhesion with fillers or finishing coats.
For a gelcoat finish, apply gelcoat to slightly overfill the repaired area and allow to cure. When cured sand smooth with wet & dry sand paper, finishing with a very fine grit paper, and polishing.
- Clean up brushes etc. with acetone.